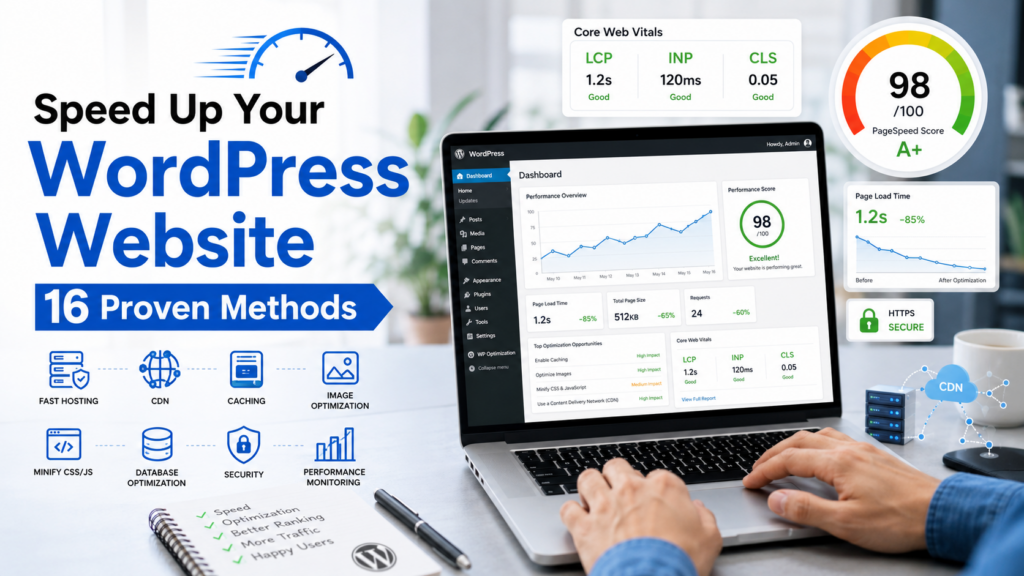

A slow WordPress website can frustrate visitors, reduce search rankings, and hurt conversions. Even a delay of a few seconds may increase bounce rates and make people leave before your page fully loads.
The good news is that most WordPress speed problems can be fixed. In many cases, you do not need to rebuild your website or switch platforms. Simple improvements such as better hosting, image optimization, caching, and removing unnecessary plugins can make a noticeable difference.
Before making major changes, create or confirm a recent backup of your website. This allows you to restore your site if something unexpected happens during optimization.
In this guide, you will learn how to speed up your WordPress website step by step using safe and practical methods. The guide starts with the easiest checks and gradually moves toward more advanced performance improvements. For a broader website performance check, you can also read our guide on how to fix a slow-loading website. How to fix a slow-loading website
If you want to improve the speed of any type of website, not just WordPress, you can also read our complete guide on How to speed up a website for SEO.
🚀 Quick Start
To speed up your WordPress website, check these areas in order:
| Step | Check | Why |
| 1 | Test your website speed | Find current performance issues |
| 2 | Choose quality hosting | Slow servers affect every page |
| 3 | Enable page caching | Reduce server processing time |
| 4 | Optimize images | Large images slow loading |
| 5 | Use a lightweight theme | Heavy themes reduce speed |
| 6 | Remove unused plugins | Reduce unnecessary requests |
| 7 | Update WordPress, plugins and themes | Improve performance and compatibility |
| 8 | Enable browser caching | Speed up repeat visits |
| 9 | Minify CSS and JavaScript | Reduce file sizes |
| 10 | Use a Content Delivery Network (CDN) | Faster loading worldwide |
| 11 | Optimize the WordPress database | Remove unnecessary data |
| 12 | Enable GZIP or Brotli compression | Reduce transferred data |
| 13 | Enable lazy loading | Load images only when needed |
| 14 | Reduce external requests | Improve page loading time |
| 15 | Monitor Core Web Vitals | Maintain long-term performance |
| 16 | Test your website again | Confirm improvements |
Estimated optimization time: 30 minutes to several hours, depending on your website size and the changes required.
🔎 What Makes a WordPress Website Slow?
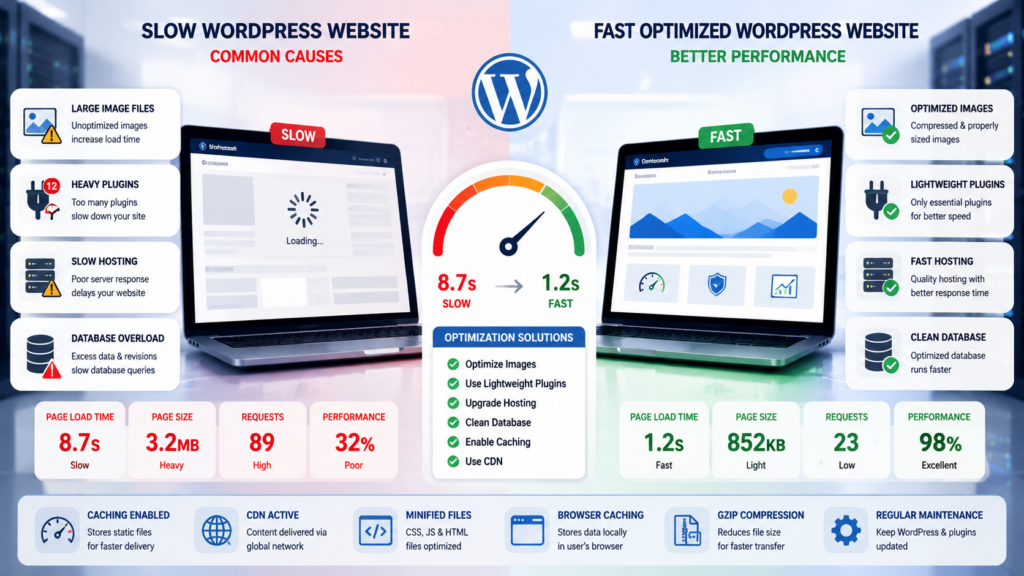
A WordPress website does not become slow because of one single issue. In most cases, several small performance problems combine to increase loading time.
Common causes include:
- Low-quality web hosting
- Large uncompressed images
- Too many plugins
- Poorly coded themes
- Unoptimized CSS and JavaScript files
- No caching
- Slow database queries
- Too many external scripts
- High server response time
- Outdated WordPress software
For example, installing several heavy plugins may increase database queries and HTTP requests. At the same time, uploading large images without compression can further slow every page.
Instead of guessing the cause, it is better to test your website first and identify which areas need improvement.
👉 Learn more from the official WordPress performance optimization guide. Official WordPress performance optimization guide
🚩 Signs Your WordPress Website Needs Speed Optimization
Many website owners notice the problem only after visitors start leaving or search rankings begin to drop. Watching for early warning signs can help you fix performance issues before they affect your users.
Some common signs include:
- Pages take several seconds to load.
- Images appear slowly while scrolling.
- Visitors leave the website quickly.
- Google PageSpeed Insights reports poor scores.
- Core Web Vitals show failed assessments.
- WordPress admin feels slow.
- Checkout or contact forms respond slowly.
- Search engine rankings begin to decline.
- Mobile pages load much slower than desktop pages.
- High server response times appear during testing.
If you notice one or more of these problems, do not assume your hosting is always the cause. Testing each performance area step by step will help you identify the real bottleneck rather than making unnecessary changes.
📊 Quick Speed Diagnosis Table
| Symptom | Possible Cause | Check First |
| Website loads slowly on every page | Slow hosting | Test server response time |
| Images load very slowly | Unoptimized images | Compress and resize images |
| Homepage is slower than other pages | Heavy homepage content | Review sliders, videos and scripts |
| Slow only on mobile devices | Large assets | Test mobile performance |
| Admin dashboard is slow | Plugins or database | Check plugin usage and database health |
| Website becomes slow after installing a plugin | Plugin conflict | Disable the recent plugin temporarily |
| Slow only during busy hours | Server resource limits | Check hosting usage |
| Poor Core Web Vitals | Render-blocking resources | Optimize CSS and JavaScript |
This table helps you identify the most likely cause before you begin optimizing your WordPress website.
🔧 16 Ways to Speed Up Your WordPress Website
Start with the improvements that usually have the biggest impact. After completing each step, test your website again before moving to the next one. This helps you identify which change improved your website speed.
Step 1 – Test Your Website Speed First
Before making any changes, measure your website’s current performance. Testing first gives you a clear starting point and helps you compare results after optimization.
A speed test can show:
- Page loading time
- Largest Contentful Paint (LCP)
- First Contentful Paint (FCP)
- Interaction to Next Paint (INP)
- Cumulative Layout Shift (CLS)
- Server response time
- Render-blocking resources
- Large images
- JavaScript and CSS issues
Run at least two or three tests because internet conditions and server load can change the results slightly.
If possible, test:
- Homepage
- One blog post
- One category page
- One product page (for WooCommerce websites)
Record the results before making any optimization changes. This will help you measure the real improvement later.
👉 Test your website speed: Google PageSpeed Insights
👉 Additional testing tool: GTmetrix Website Speed Test

Step 2 – Choose a Fast and Reliable WordPress Hosting Provider
Even a perfectly optimized website can feel slow if the hosting server performs poorly.
Your hosting provider affects:
- Server response time
- Database performance
- Website uptime
- Traffic handling
- PHP performance
- Overall loading speed
Signs that your hosting may be slowing down your website include:
- Every page loads slowly.
- The website becomes slow during busy hours.
- High server response time appears in speed reports.
- The admin dashboard also feels slow.
- Visitors experience random loading delays.
Before moving to a new hosting company, ask your current host to check:
- Server resource usage
- PHP version
- Database performance
- CPU usage
- Memory limits
- Error logs
Sometimes upgrading to a better hosting plan solves the problem without changing providers.
If your website shows server errors instead of only loading slowly, read our guide: Fix Error Establishing a Database Connection in WordPress
Step 3 – Enable Page Caching
Every time someone visits your website, WordPress normally generates the page by processing PHP code and database queries.
Page caching creates a ready-made version of the page so the server does not need to rebuild it for every visitor.
Benefits of page caching include:
- Faster page loading
- Lower server usage
- Reduced database requests
- Better visitor experience
- Improved performance during traffic spikes
Many caching plugins allow you to enable page caching with only a few clicks.
After enabling caching, clear the cache and test your website again to confirm the improvement.
Avoid installing multiple caching plugins at the same time because they can conflict with each other and reduce performance instead of improving it.
👉 Learn more about caching in the official WordPress caching guide. Official WordPress caching guide

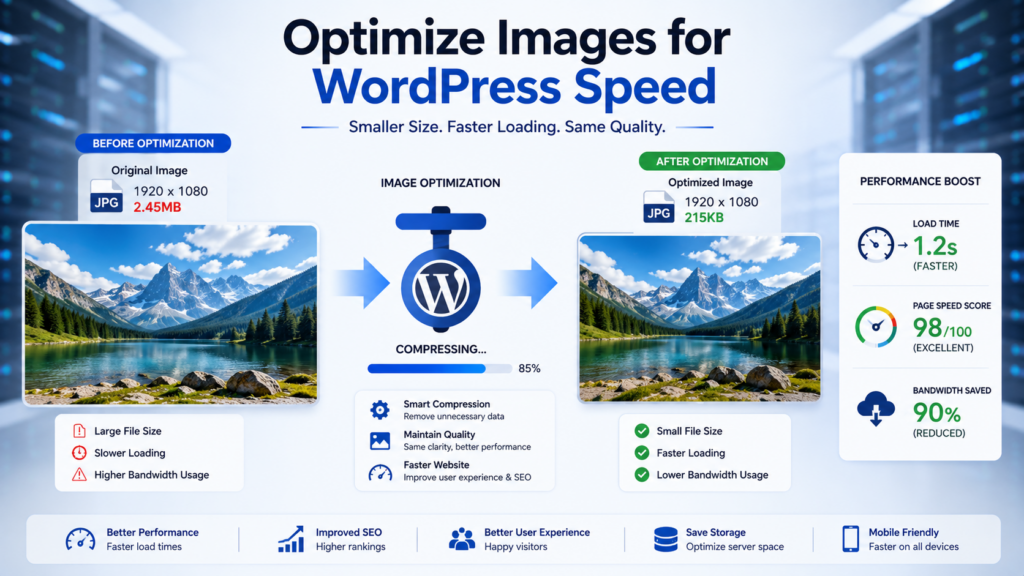
Step 4 – Optimize and Compress Images
Large images are one of the most common reasons why WordPress websites load slowly.
Uploading images directly from a phone or camera without optimization can significantly increase page size.
Before uploading an image:
- Resize it to the required dimensions.
- Compress it without noticeable quality loss.
- Use modern image formats when appropriate.
- Avoid uploading images much larger than needed.
Also review older blog posts because large images uploaded years ago can continue slowing your website.
Image optimization improves:
- Faster page loading
- Better mobile performance
- Lower bandwidth usage
- Improved Core Web Vitals
- Better visitor experience
Do not sacrifice image quality unnecessarily. The goal is to reduce file size while keeping images clear and professional.
👉 Best practices for image optimization: Image Optimization Guide by web.dev
Step 5 – Use a Lightweight WordPress Theme
Some WordPress themes include unnecessary animations, large scripts, page builders, and extra features that increase loading time.
A lightweight theme focuses on clean code and fast performance while still providing the features needed for your website.
When choosing a theme, consider:
- Clean coding standards
- Regular updates
- Good compatibility with the latest WordPress version
- Mobile responsiveness
- Fast loading performance
- Minimal unnecessary features
Avoid changing your theme only because a speed test shows a small difference. If your current theme performs well and meets your needs, optimize other areas first. If you recently changed themes and noticed a significant drop in performance, compare the new theme with your previous one before making additional changes.
Step 6 – Remove Unused and Heavy Plugins
Plugins add useful features to WordPress, but installing too many plugins can slow down your website. Every active plugin may use server resources, database queries, CSS files, JavaScript files, or external requests.
A large number of plugins does not always make a website slow. The real issue is using poorly coded, outdated, or unnecessary plugins.
Review your installed plugins and ask yourself:
- Do I still need this plugin?
- Is another plugin already doing the same job?
- Has this plugin been updated recently?
- Does it affect website performance?
Remove plugins that you no longer use instead of simply deactivating them. Inactive plugins can still take up storage space and should be deleted if they are no longer needed.
Also avoid installing several plugins that perform the same task, such as multiple caching or image optimization plugins. After removing unnecessary plugins, clear your cache and test your website again to measure the improvement.
Step 7 – Keep WordPress, Themes, and Plugins Updated
Running outdated software can affect both website performance and security.
Developers regularly release updates to:
- Improve speed
- Fix bugs
- Improve compatibility
- Patch security issues
- Optimize database queries
Before installing updates:
- Create or confirm a recent backup.
- Read the update notes if available.
- Test major updates on a staging website whenever possible.
Do not ignore updates for months because older software may become slower or incompatible with newer versions of PHP and WordPress. After updating WordPress, plugins, or themes, test your website carefully to confirm that everything is working correctly.
Step 8 – Enable Browser Caching
Browser caching allows visitors’ web browsers to store static files such as images, CSS, JavaScript, and fonts.
When the same visitor returns to your website, the browser can reuse many of these files instead of downloading them again.
Benefits of browser caching include:
- Faster repeat visits
- Reduced server load
- Lower bandwidth usage
- Better user experience
Many caching plugins and hosting providers allow browser caching to be enabled automatically.
If you are using a CDN or web server configuration, browser caching rules may already be active.
Avoid making manual server configuration changes unless you understand how your hosting environment works.
Step 9 – Minify CSS and JavaScript Files
Every WordPress website loads CSS and JavaScript files to display layouts, styling, animations, and interactive features.
Some of these files contain extra spaces, comments, or unnecessary formatting that increase file size.
Minification removes this unnecessary code while keeping the website working the same way.
Benefits include:
- Smaller file sizes
- Faster downloads
- Better page performance
- Improved Core Web Vitals
Some optimization tools can also defer non-critical JavaScript, remove unused CSS, or delay selected scripts. Test each option carefully because the best settings depend on your theme, plugins, and server setup.
However, do not enable every optimization option at once. Test one change at a time because aggressive optimization can sometimes break layouts or website functionality. After enabling minification, clear all caches and test important pages carefully.
Step 10 – Use a Content Delivery Network (CDN)
A Content Delivery Network (CDN) stores copies of your website’s static files on multiple servers located around the world.
Instead of downloading files from one location, visitors receive them from the server closest to them.
A CDN can improve:
- Global loading speed
- Image delivery
- CSS and JavaScript delivery
- Website stability during traffic spikes
- Reduced load on your hosting server
A CDN is especially useful if your website has visitors from multiple countries.
If most of your visitors come from one local area, the improvement may be smaller, but a CDN can still help reduce server load and improve reliability.
After enabling a CDN, test your website again to confirm that images, scripts, and styles are loading correctly. 👉 Learn how CDNs improve performance: What is a CDN? – Cloudflare

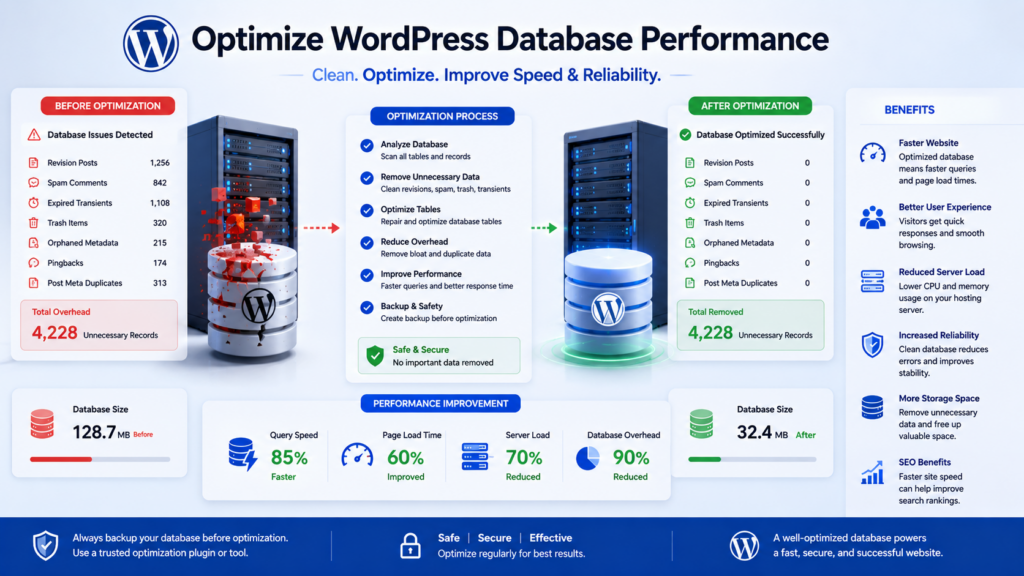
Step 11 – Optimize Your WordPress Database
Over time, your WordPress database stores unnecessary data such as post revisions, spam comments, expired transients, and other temporary records. This extra data can make database queries slower and affect website performance.
Optimizing your database helps remove unnecessary information and keeps it running more efficiently.
Common items that can be cleaned include:
- Post revisions
- Spam comments
- Trashed posts and pages
- Expired transients
- Unused database tables left by deleted plugins
- Orphaned metadata
Before making database changes:
- Create or confirm a recent database backup.
- Remove only data you understand.
- Avoid deleting tables manually unless you know their purpose.
Database optimization should be performed regularly, especially on websites that publish content frequently or receive many comments.
Note: If you see database connection errors while optimizing your database, read our troubleshooting guide: Fix Error Establishing a Database Connection in WordPress
Step 12 – Enable GZIP or Brotli Compression
When someone visits your website, files such as HTML, CSS, and JavaScript are sent from the server to the visitor’s browser.
Compression reduces the size of these files before they are transferred, allowing pages to load faster.
Most modern hosting providers support either:
- GZIP Compression
- Brotli Compression
Benefits include:
- Smaller file transfers
- Faster page loading
- Reduced bandwidth usage
- Better visitor experience
Many web servers, caching plugins, and CDN services can enable compression automatically.
After enabling compression, test your website again to confirm that pages load correctly.
👉 How compression improves performance: Enable Text Compression – web.dev
Step 13 – Enable Lazy Loading for Images and Videos
Without lazy loading, browsers try to load every image and video on a page immediately, even if visitors never scroll that far.
Lazy loading delays loading media until it is about to appear on the screen.
This can improve:
- Initial page loading speed
- Mobile performance
- Bandwidth usage
- User experience
Lazy loading is especially useful for:
- Long blog posts
- Product pages
- Image galleries
- Landing pages with many images
Most modern versions of WordPress already support image lazy loading, but you should still test your pages after making changes to ensure all images display correctly.
Step 14 – Reduce External Requests
Many WordPress websites load files from third-party services such as fonts, advertisements, analytics tools, social media widgets, videos, and tracking scripts.
Each additional request can increase page loading time.
Review external resources carefully and remove anything that is not necessary.
Common examples include:
- Unused Google Fonts
- Social media widgets
- Advertisement scripts
- Live chat widgets
- External tracking tools
- Embedded videos
- Unnecessary marketing scripts
Only keep services that provide real value to your website. After removing unnecessary requests, test your website again to measure the improvement.
Step 15 – Monitor Core Web Vitals
Improving website speed is not only about loading faster. It is also about providing a better experience for visitors.
Google uses Core Web Vitals to measure important aspects of page performance.
The main metrics include:
- Largest Contentful Paint (LCP)
- Interaction to Next Paint (INP)
- Cumulative Layout Shift (CLS)
| Metric | Good Target |
| LCP | 2.5 seconds or less |
| INP | 200 milliseconds or less |
| CLS | 0.1 or less |
Regularly monitor these metrics after making optimization changes.
If one metric becomes worse after an update, investigate the recent changes before making additional optimizations.
Website performance should be monitored continuously instead of being checked only once.
👉 Official Core Web Vitals documentation: Google Core Web Vitals Guide

Step 16 – Test Your Website Again
After completing your optimizations, run another speed test using the same tool you used before making changes.
Compare the new results with your original measurements.
Check whether:
- Page loading time improved.
- Core Web Vitals scores increased.
- Server response time decreased.
- Images load correctly.
- CSS and JavaScript work normally.
- Mobile performance improved.
- No new errors appeared.
If some areas are still slow, optimize one issue at a time instead of making multiple changes together. Website performance is an ongoing process. Regular testing helps you identify new problems before they affect visitors or search rankings.
✅ Final Speed Optimization Checklist
Use this checklist after completing the optimization process.
| Optimization Task | Status |
| Website speed tested before changes | ☐ |
| Hosting performance reviewed | ☐ |
| Page caching enabled | ☐ |
| Images optimized | ☐ |
| Unused plugins removed | ☐ |
| WordPress updated | ☐ |
| Browser caching enabled | ☐ |
| CSS and JavaScript optimized | ☐ |
| CDN configured | ☐ |
| Database optimized | ☐ |
| Compression enabled | ☐ |
| Lazy loading enabled | ☐ |
| External requests reduced | ☐ |
| Core Web Vitals reviewed | ☐ |
| Website tested again | ☐ |
This checklist helps ensure that no important optimization step is missed before considering your website fully optimized.
🚀 Need Help Speeding Up Your WordPress Website?
If your website is still loading slowly after completing all the optimization steps, avoid making random changes. A speed problem can have more than one cause, and changing multiple settings at the same time can make troubleshooting much harder.
In some cases, the issue may be related to:
- Poor hosting performance
- Server configuration
- Database bottlenecks
- Plugin conflicts
- Theme-related issues
- CDN configuration
- Large third-party scripts
- Core Web Vitals problems
If you have already tested your website, optimized images, enabled caching, cleaned the database, and reviewed your hosting, but the website is still slow, it may be time for a professional performance audit.
Professional WordPress Speed Optimization Services
Our WordPress speed and performance service can help review caching, images, plugins, hosting, and other common causes of a slow website.
Our services include:
WordPress speed review
Cache configuration
Image optimization
Plugin performance checks
Core Web Vitals review
CDN guidance
Database cleanup guidance
Hosting performance recommendations
Get Professional WordPress Support:
- SEO Services: https://problemfixer.net/seo-tools-services/
- WordPress Services: https://problemfixer.net/wordpress-services/
- AI Tools Services: https://problemfixer.net/ai-tools-services/
Every website is different, so recommendations should be based on your website’s actual performance rather than applying the same settings everywhere.
🧰 Keep Your WordPress Website Fast
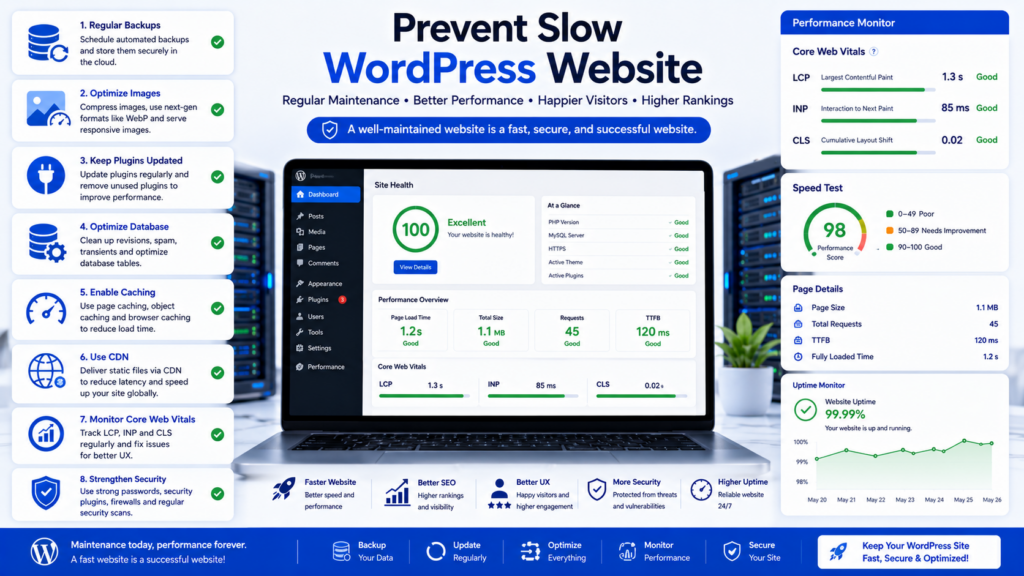
Improving website speed is important, but maintaining good performance over time is even more valuable.
Following good maintenance practices can help prevent your website from becoming slow again.
Update WordPress Regularly
Update WordPress core, themes, and plugins regularly.
Updates often include:
- Performance improvements
- Security fixes
- Better compatibility
- Bug fixes
Always create a backup before installing major updates.
Upload Optimized Images
Large images remain one of the biggest causes of slow websites.
Before uploading an image:
- Resize it correctly.
- Compress it.
- Use modern image formats where appropriate.
- Avoid uploading images directly from a camera without optimization.
Delete Unused Plugins
Review your plugins regularly.
Delete plugins that are no longer needed instead of leaving them inactive. Choose quality plugins that receive regular updates.
Check Performance Regularly
Do not wait until visitors complain.
Test your website regularly and monitor:
- Page loading speed
- Core Web Vitals
- Server response time
- Uptime
- Database performance
Small problems are much easier to fix before they become major issues.
Use Reliable Hosting
As your website grows, your hosting requirements may also change.
If your website receives more visitors or contains more content, review whether your hosting plan still provides enough resources. Fix WordPress 403 Forbidden Error.
Test Your Website After Every Major Change
Whenever you:
- Install a plugin
- Change your theme
- Add a page builder
- Migrate your website
- Restore a backup
- Change hosting
Run another speed test to make sure website performance has not been affected.
🎯 Final Thoughts
A slow WordPress website does not always require a complete rebuild or expensive upgrades. In many cases, improving website speed comes down to identifying the real bottleneck and fixing it step by step.
Start by testing your website, then focus on the areas that have the biggest impact, such as hosting, caching, images, plugins, database optimization, and Core Web Vitals. Test your website after each change instead of making multiple adjustments at once.
Remember that website performance is not a one-time task. Regular maintenance, software updates, and performance monitoring will help keep your website fast as it grows. A faster website provides a better experience for visitors, supports search visibility, and helps improve conversions over time.
💬 WordPress Speed FAQs
1. Why Is My WordPress Website Slow?
A WordPress website can become slow because of poor hosting, large images, too many plugins, heavy themes, missing caching, database issues, or unnecessary external scripts.
2. What is the fastest way to speed up a WordPress website?
Start by testing your website, enabling page caching, optimizing images, removing unnecessary plugins, and reviewing your hosting performance.
3. Does hosting affect WordPress speed?
Yes. Hosting plays a major role in website performance because it affects server response time, database performance, and overall loading speed.
4. Do too many plugins slow down WordPress?
Not always. The quality of plugins matters more than the number. Poorly coded or unnecessary plugins are more likely to reduce performance.
5. Should I use a CDN?
A CDN is recommended for websites that receive visitors from different regions because it can improve loading speed and reduce server load.
6. How often should I optimize my WordPress database?
Review your database regularly, especially if your website publishes content frequently or receives many comments.
7. Does image optimization improve SEO?
Yes. Image optimization can reduce page weight and improve loading performance. Faster, more stable pages provide a better user experience, but image optimization alone does not guarantee higher search rankings.
8. What are Core Web Vitals?
Core Web Vitals measure real-world loading performance, responsiveness, and visual stability. The current metrics are Largest Contentful Paint (LCP), Interaction to Next Paint (INP), and Cumulative Layout Shift (CLS).
9. Can caching break my website?
Incorrect cache settings can occasionally cause display problems. Always clear your cache and test your website after making changes.
10. How often should I test my website speed?
Test your website after major updates and perform regular performance checks to identify new issues before they affect visitors.